We’ve talked a little bit about using a Synology for backup in this blog. A Synology is a type of NAS, or Network Attached Storage. A NAS allows you to set up a home network with relative ease, and a Synology is even easier to use than most. Imagine being able to easily access multiple decades’ worth of photos, and all the movies you’ve taken, and backups of files for your home business at all times. All the important data from your phones, iPads, and laptops could flow to the same place, get organized, and be backed up to a cheap (but very reliable) off-site cloud service—Amazon S3. Sounds good, doesn’t it? This setup does require a bit of configuration, so here’s what you do when setting one up for the first time. But once you do that, you still need to set things up to back up your files. And though there are plenty of articles that can guide you through the Synology setup, there are relatively few that walk you through the use of Amazon S3. Settle in.
Step 1: Install Drive on Your Synology and Your Computer
The Drive app is used to synchronize files between a local computer and your Synology. If you’ve used Dropbox or OneDrive, it’s the same idea, except the Synology replaces the cloud. Anything in your Drive folder will be synced to a Drive folder on your Synology. Drive is a fairly new app for the Synology, replacing its Cloud Station app, so there aren’t a lot of tutorials available for it yet.
Download the Drive app for your Synology by going to the Package Center, searching for Drive, and installing the app. It’s as simple as downloading an app for your phone.
Then, download the Drive app for your desktop computer, iPhone, and Android devices. For a PC or Mac, go here: https://www.synology.com/en-us/support/download. For your smartphone or tablet, you can find the app in the Play or Apple Store.
Step 2: Set up the Drive Apps to Sync
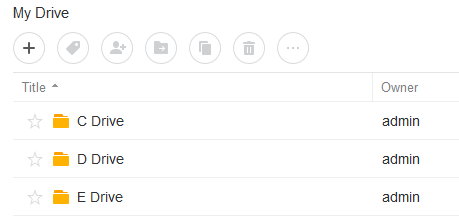
First, on your Synology, go to the Drive app and click on “My Drive.” Click the + in this screencap to create a new folder. We recommend giving it the same name as the folder or drive you plan to back up on your local computer. In this case, we created the C drive.
Next, on your computer or other device, open the Drive app and follow the prompts. When you come to the screen for “Sync Tasks,” click the “Create” button to set up the folder you want to synchronize with the Synology.
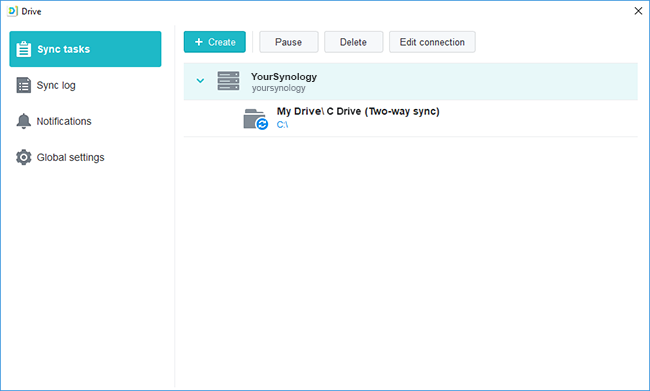
Then you’ll follow another set of prompts. You’ll select the Synology NAS you want to use for this task (and you’ll generally have only one choice), then move to the next screen to choose your drives to sync up.
Hover over the area that says “Drive server,” and you’ll see a pencil icon that pops up. Click it to pick the folder you just created on your Synology, and then click “OK” to return to the screen above.

Next, hover over the area that says “Local Folder,” and click the pencil icon to pick the folder on your local computer to sync to the Synology.
Note that the default is “two-way sync,” and that works well for most people. You can always hit the “Sync Rules” button on the same screen where you set up the initial folders on your desktop Drive app, and tweak the sync rules. One-way upload, filtering out certain file extensions from syncing, and enabling synchronization of temporary files to sync are just a few of the options.
Step 3: Back it up to the Cloud!
Now that you’ve got your computers backing up to your Synology, now it’s time to back it up to an off-site server… also known as the cloud. We like a simple app for Synology called Hyper Backup.
Simply go to your Synology and click on the Package Center to find Hyper Backup. When you have it installed, open Hyper Backup and a simple wizard will open. You can choose from a number of cloud services, including Dropbox and Google Drive. While those two options are easy to use, we’re going to choose S3 Storage, an extremely inexpensive (see pricing here) and reliable Amazon storage service.
On the next window in the wizard, you’ll be prompted to enter an Access Key, a Secret Key, a Bucket Name, and a Directory. At this point, you will want to pause and sign up for Amazon S3 if you haven’t done so already. Go to this link to sign up! You can watch a short video and learn more about S3 here, but really… all you need are the Access Key, the Secret Key, and the name of a Bucket you’ll set up.
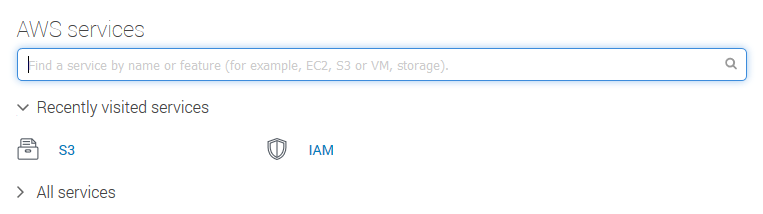
When you log into the Amazon Web Services (AWS) dashboard, you’ll see this handy search bar. Just search for S3, and it will bring you right to a section where you can set up your bucket. Once again, the default settings are ideal for most people who wish to back up their Synology to the cloud.
When you go back to the Hyper Backup app in your Synology, you’ll enter that Access Key and Secret Key, then you’ll choose the Bucket Name you created from a dropdown. The Directory field will auto-populate.
On the next screen, you’ll select the folders you want to back up to Amazon S3. Then there’s another screen where you can select which Synology apps you want to back up, if any. Personally, we don’t see the need for that as beginning Synology users. We’re just here for the basics.
Then: another screen. Here you can tweak your backup time and frequency, and you can select which Amazon storage level you want to use: Standard, Reduced Redundancy, and Standard – Infrequent Access. There’s one last screen where you can enable Backup Rotation, but we’re not recommending that. You’ll hit the “Apply” button… and that’s it! You’re backing up to Amazon!